Applies To: ■ PoliteMail Desktop ■ PoliteMail Online □ PoliteMail O365
Version: □ 4.9 □ 5.0 ■ 5.1+
Enhanced Filtered Lists
If you have many people or lists in PoliteMail, creating a list that filters exactly the people you want can be a challenge. Currently, you are limited to filtering only on custom fields, such as “Region” or “Location”, which is relatively inflexible. What if you want to create a list for either people in the Eastern region or in Seattle, or were hired after a specific date? With our enhanced Filtered Lists feature, available in version 5.1 and later of PoliteMail, you can!
Accessing the New Filtered Lists
- Your Administrator can set whether the new Filtered Lists are available to you. If the new Filtered List functionality is activated, you will see a window open when you create a Filtered List, as opposed to a panel on the side. Note that if your Administrator turns off the new functionality, any Filtered Lists created when the feature was on will be hidden.
- You can create Filtered Lists in either the desktop or online editions of PoliteMail; you can access any Filtered Lists in PoliteMail for M365, but you cannot create them.
What’s New in Filtered Lists
- Filtered Lists have a new, more intuitive user interface!
- Preview your filter results to see if it’s working as expected.
- Filter on contact properties in addition to Custom Fields!
- New data types for Custom Fields allow you to filter by date, true/false condition, mathematical operations, and more.
- Create filters using “OR” logic instead of being limited to “AND” operations only.
- Create advanced filters that allow you to group filter conditions together.
- Works with fresh data coming in via Syncronym, allowing users to create new lists in PoliteMail much more quickly!
 Custom Fields
 Custom Fields
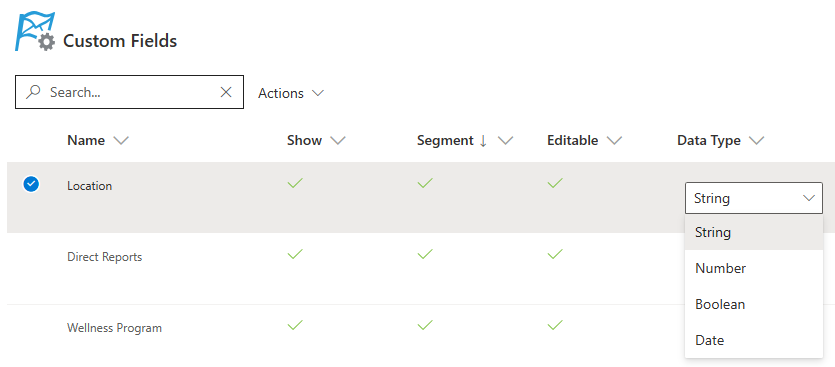
When you create a Custom Field, you can now designate one of four data types for it, instead of being limited to strings.
Data Type | Description |
String | A sequence of up to 255 letters, numbers, symbols, and/or spaces |
Number | Any real number, including decimals |
Boolean | A type that can be set to only True or False |
Date | A full date in mm/dd/yyyy format |
Keep in Mind…
- Custom Fields are managed by Admins.
- To use a Custom Field in a Filtered List, it must be given a name. This eliminates confusion when trying to choose from a list of fields all called ‘Custom Field 1’, ‘Custom Field 2’, etc. A column will display in your list of Custom Fields indicating if it is filterable or not.
- Trying to change a type that is already referenced in a Filter will give an error.
- Filtered Lists created in the previous version of filtering can be used as a parameter when selecting ‘PoliteMail List’ as a type. However, filtered lists created under the old method cannot be edited in the new Filtered Lists view; the old lists would need to be converted first.
- If you are scheduling a send to a Filtered List, the membership of the list at the time it is scheduled will be used, not the time it is sent.
Basic Filtering
Basic Filtering is similar to the older version of filtering, except that you can not only filter on Custom Fields, but also on PoliteMail lists or Contact properties (such as a company or title).
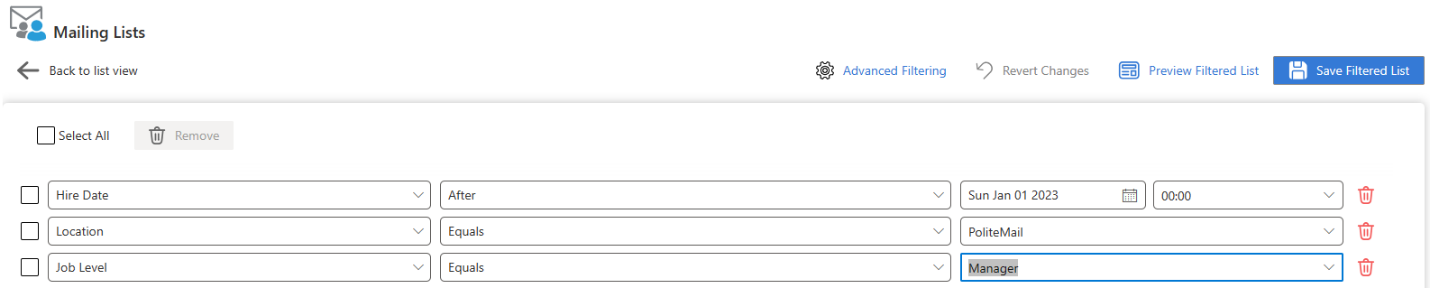
Column | Description |
1 | Select the field to filter on. You will not only see your Custom Fields, but also Contact properties and any already-created PoliteMail Lists (including Lists created using the old Filtered Lists). |
2 | Choose the operator to use. What displays here will vary depending on the data type of the field (for example, a Date type will show ‘before’ and ‘after’ as options, whereas a String will show ‘contains’). |
3 | Select or enter what the filter line should look for. For clarity, only the 40 most-used items will display by default, but you can type anything you wish. Your Administrator can increase this to as much as 100, and fields with fixed options will display all options. |
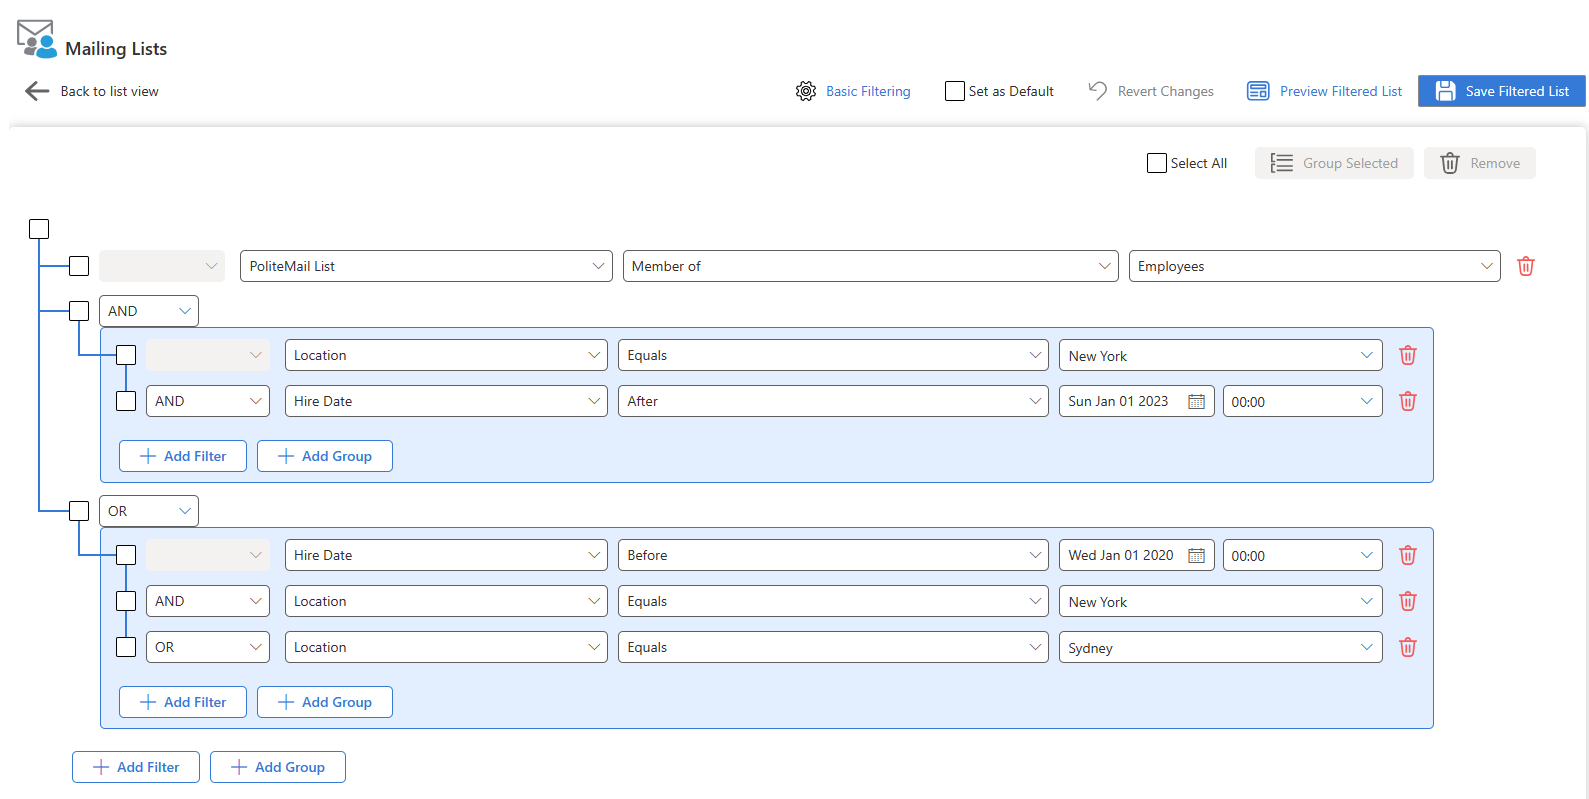
Advanced Filtering
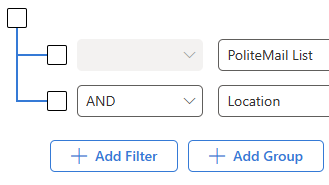
Click the ‘Advanced Filtering’ button to switch to the advanced filtering mode, which allows you to use ‘OR’ operations as well as Grouping. You can make this view the default by clicking the ‘Set as Default’ box if you wish.
 The Advanced Filter screen has three additional items compared to the Basic Filter:
- A ‘tree structure’ on the left side of your filter conditions,
- A drop-down allowing you to specify ‘AND’ or ‘OR’ for the filter condition, and
- A button to create a Group.
OR Conditions
While AND conditions will require all conditions to be true, OR conditions only require any one of them to be true. For example, basic filtering will only allow you to create a filter to find employees hired after January 1 and are located in New York, but an OR condition would allow you to find employees in either New York or Dallas.
Grouping
Groups are like a set of parentheses in an equation; PoliteMail will filter the results of each group first, before filtering them together. For example, the filter below will look at all members of the PoliteMail list and are either hired after Jan 1, 2023 and based in New York, or hired before Jan 1, 2020 and are either in New York or Sydney.
Finishing Up
Preview your List!
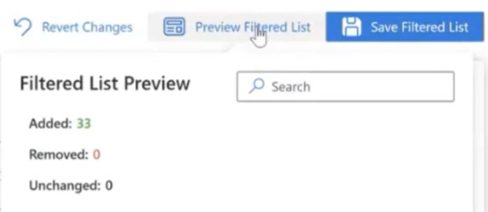

Click the Preview button to see how many results are a match to the current filter. You can also search for a specific contact name, display name, or email, so you can see if it is filtered or not.
Everything Look Good?
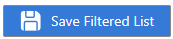 Click the Save button to be taken to the Membership screen for that list.
The Filter Membership Screen
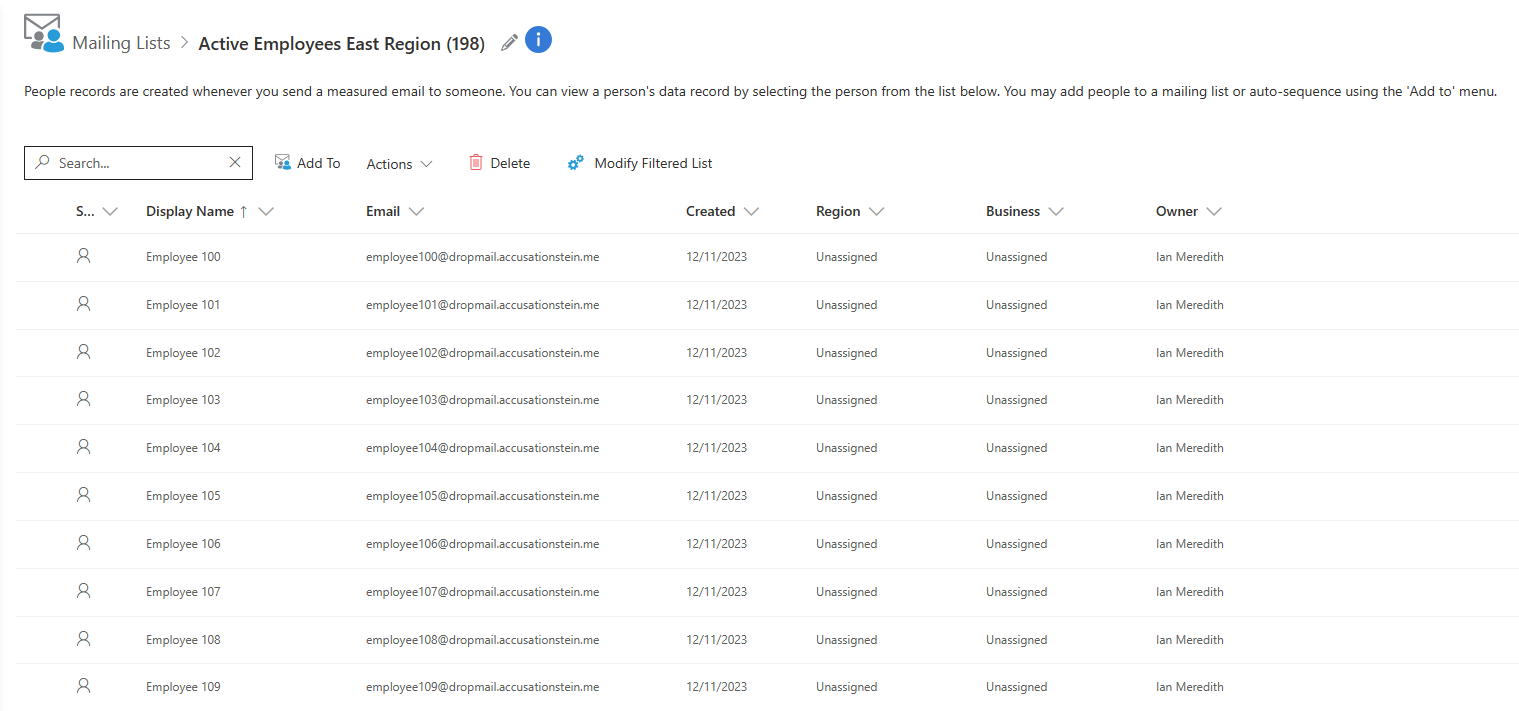 The member screen has two new icons at the top:
- The pencil icon allows you to quickly change the name of the List.
- The (i) icon will show what Filters used to create the List. Simple Filters may show more details, while more complex Filters will open the Filter screen when clicked for easier reading.
Filtering FAQs
Can I create a Filtered List from the list of people? Yes! When you go to Mailing Lists > People, you can apply any compatible filters on that screen and a 'Create Filtered List' button will appear for you to save your results as a Filtered List. However, you cannot manually assign people to a Filtered List (since they will be excluded as soon as the filter is run).
How do I create a Group from rows I’ve already created? Click on each row’s checkbox on the left, and then clicking the ‘Group Selected’ button.
Can I create a Group inside another Group? You can create a Group inside another Group one level deep, but you cannot create a Group inside a Group that is already in another Group.
What is the maximum number of rows I can create in a Filtered List? This limit is set by your Administrator.
What happens if I create an Advanced Filter and then switch to the Basic Filter? If the filter you are looking at using OR functionality or Grouping, you will need to save or modify the list first. Otherwise, you can easily switch between the two with no issue.
What does the ‘Revert Changes’ button do? The ‘Revert Changes’ button is not the same as undo! Clicking this button will reset the filter to the last version you have saved. If you have not yet saved your Filtered List, it will do nothing.
Will any List made in the old version work in the new version? Yes, but it needs to be converted first. Select the List, then click on Modify Filtered List > Convert. This will modify the list to work in the new List environment, but keep in mind this is a one-way conversion; the List will no longer be able to be edited in the old Filtered Lists interface.
Resolving Errors with Filtered Lists
There are two possible errors to look out for when creating Filtered Lists:
| Error | Description | Resolution |
|---|---|---|
| Invalid Field Data | The contents of the field do not match its Data Type, such as 'Hire Date' having text in it. Any filters used on that field will return False for that contact. | You can create a list of all contacts with invalid data for a specific field using the 'Has Valid Value' filter. You can export all contacts with invalid data by viewing the 'Validated' and 'Validation Notes' columns in the contacts screen and filtering on 'Validated = False'. |
| Invalid Filtered Lists | This is most common if a Filtered List references another List that has been deleted, setting a Custom Field that a Filtered List uses to be hidden, or by changing the data type of a Custom Field that creates an error (such as a filter that checks if a field is less than 30 and changing the data type of that field to Boolean). | Invalid filtered lists will be marked with a red X in the Valid column of the Mailing List grid. Before these lists can be sent to, you will need to open them up, fix any error messages shown on the page, and save the list. |
